The Building of the Yoda Chair
Welcome into my shop…
Below are just a few images taken during the making of your Yoda Chair. I know these are LONG overdue…. I owe you many drinks at the Mos Eisley Cantina!
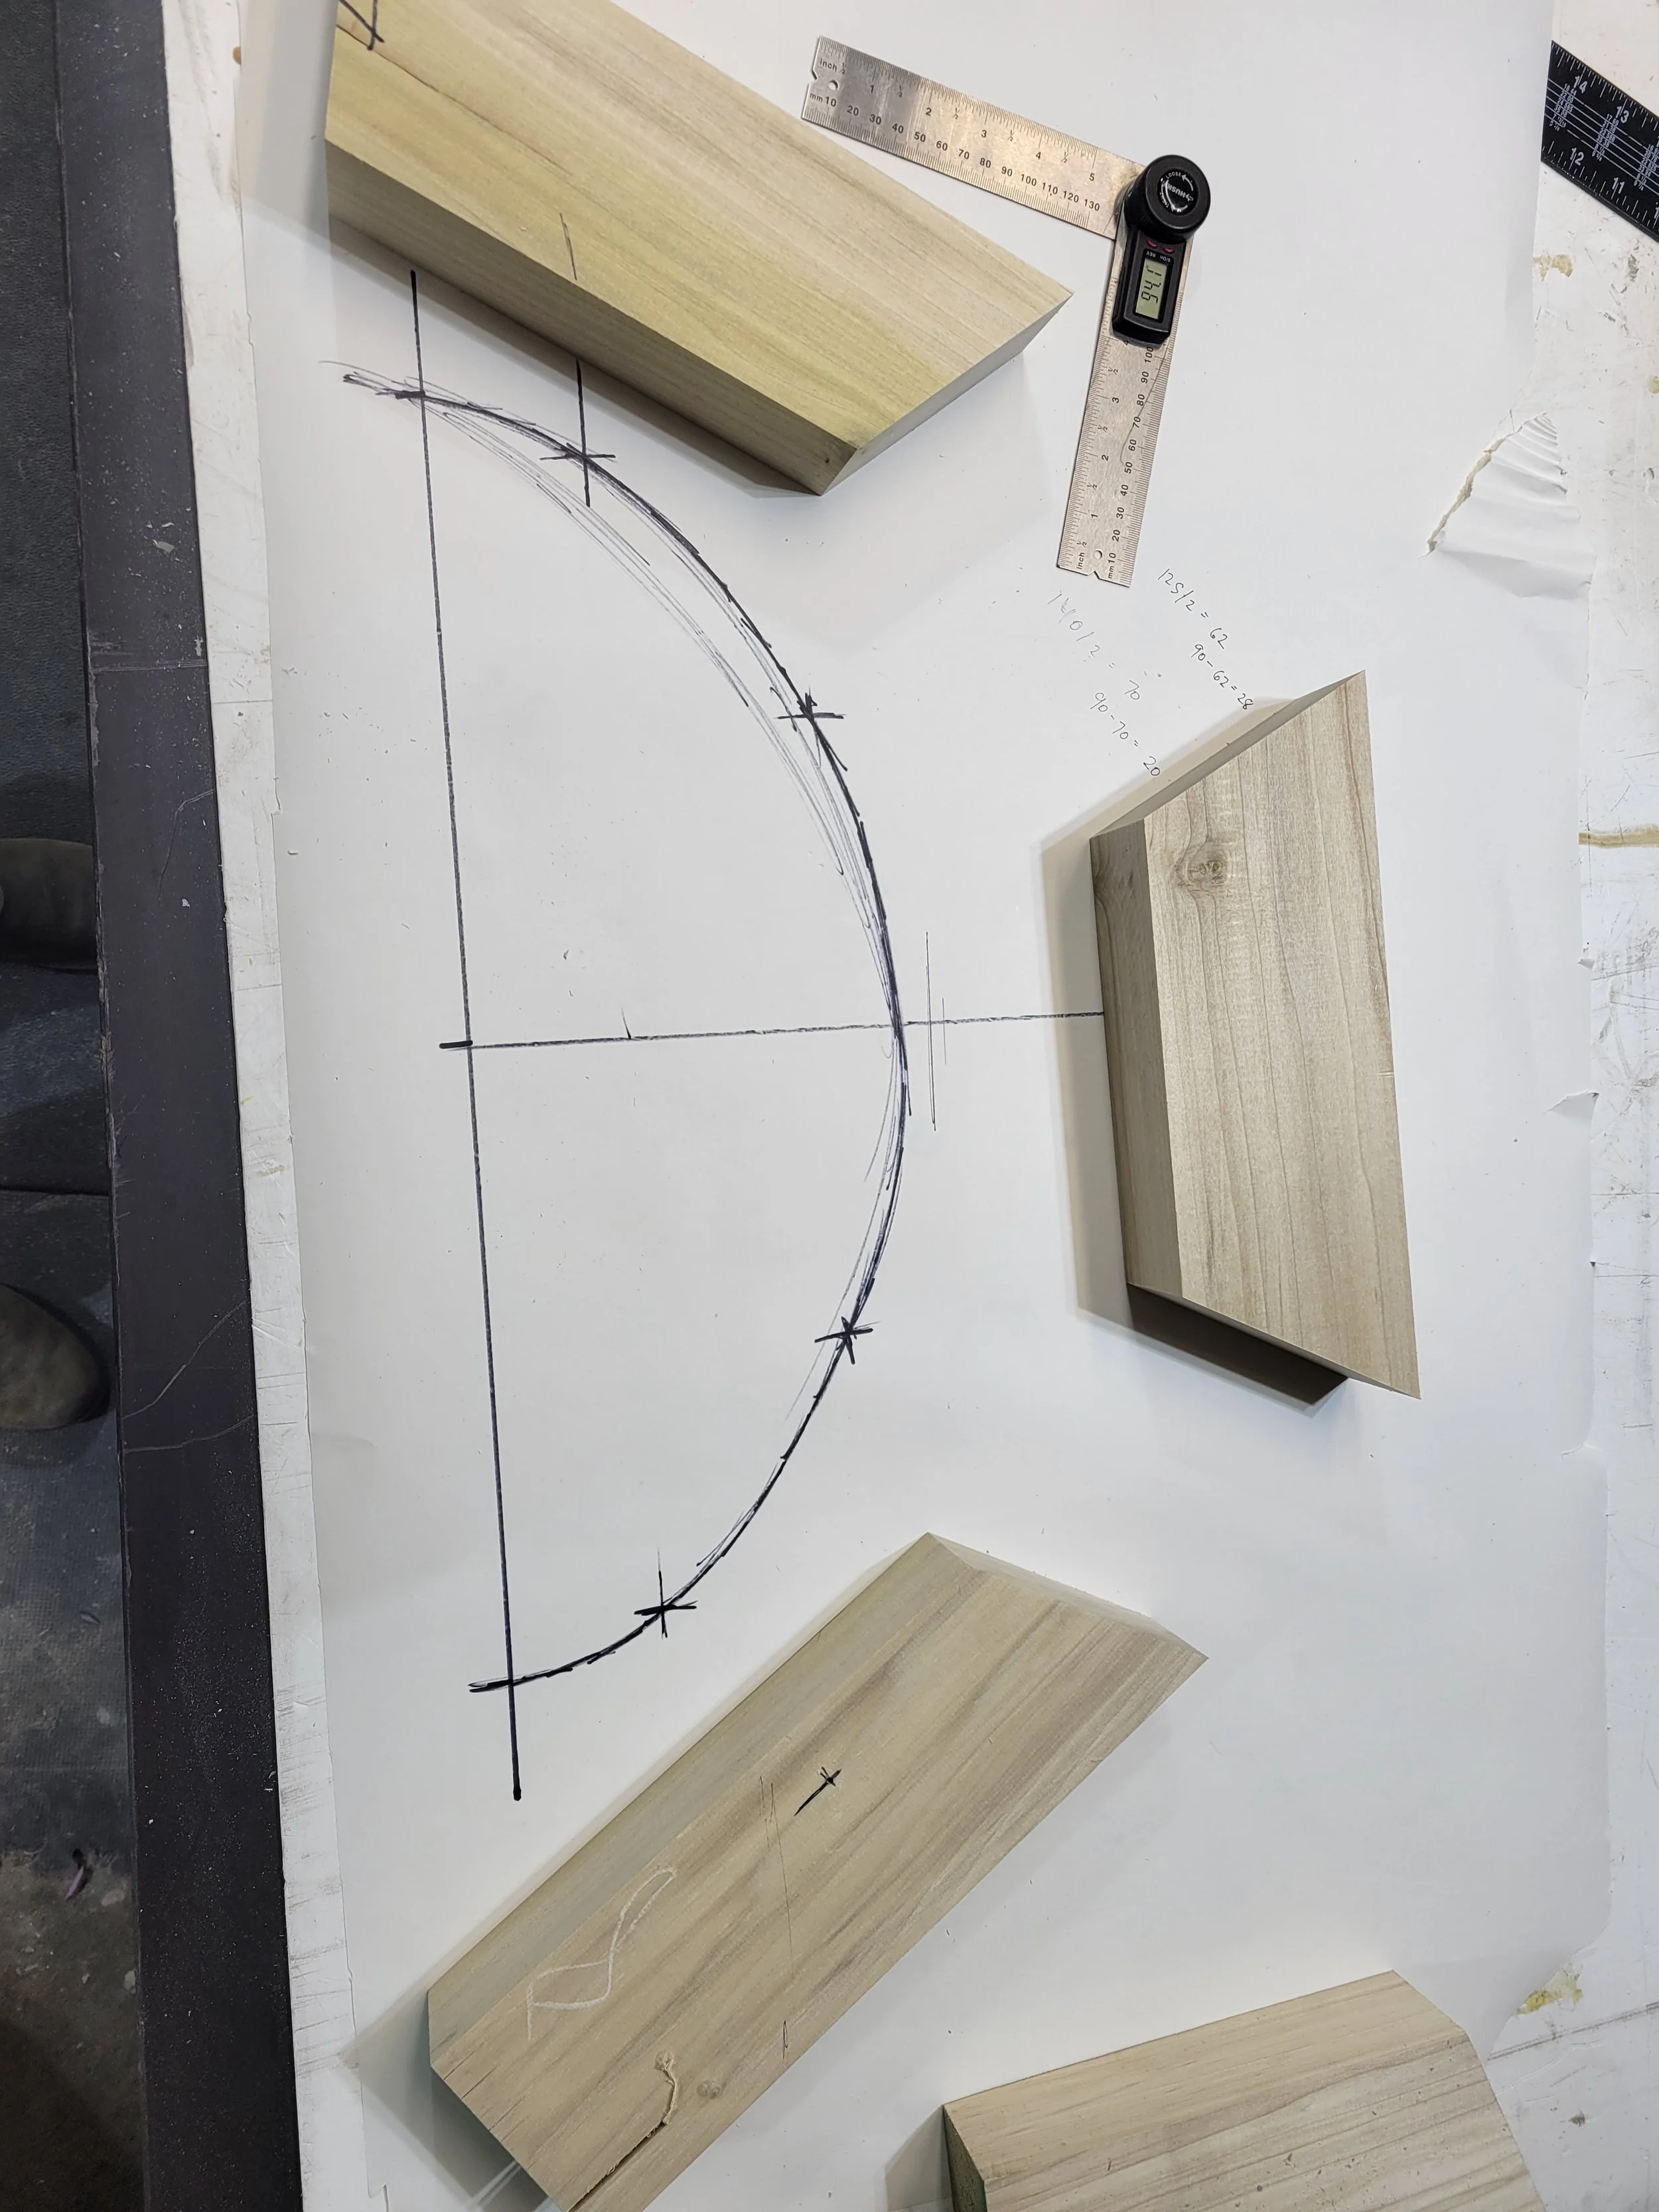
Making each circle layer
The long boards get jointed on planed to make each face smooth and parallel. They then get cut up into smaller sections and cut at angles to make a straight sided circle. A lot of similar techniques that are used in both drum making, barrel making, and brick laying are used to create this piece. Each layer is glued up individually with very tight tape temporarily holding the joints together, and then stacked and glued onto the layer beneath - this is where it really gets its mechanical strength.


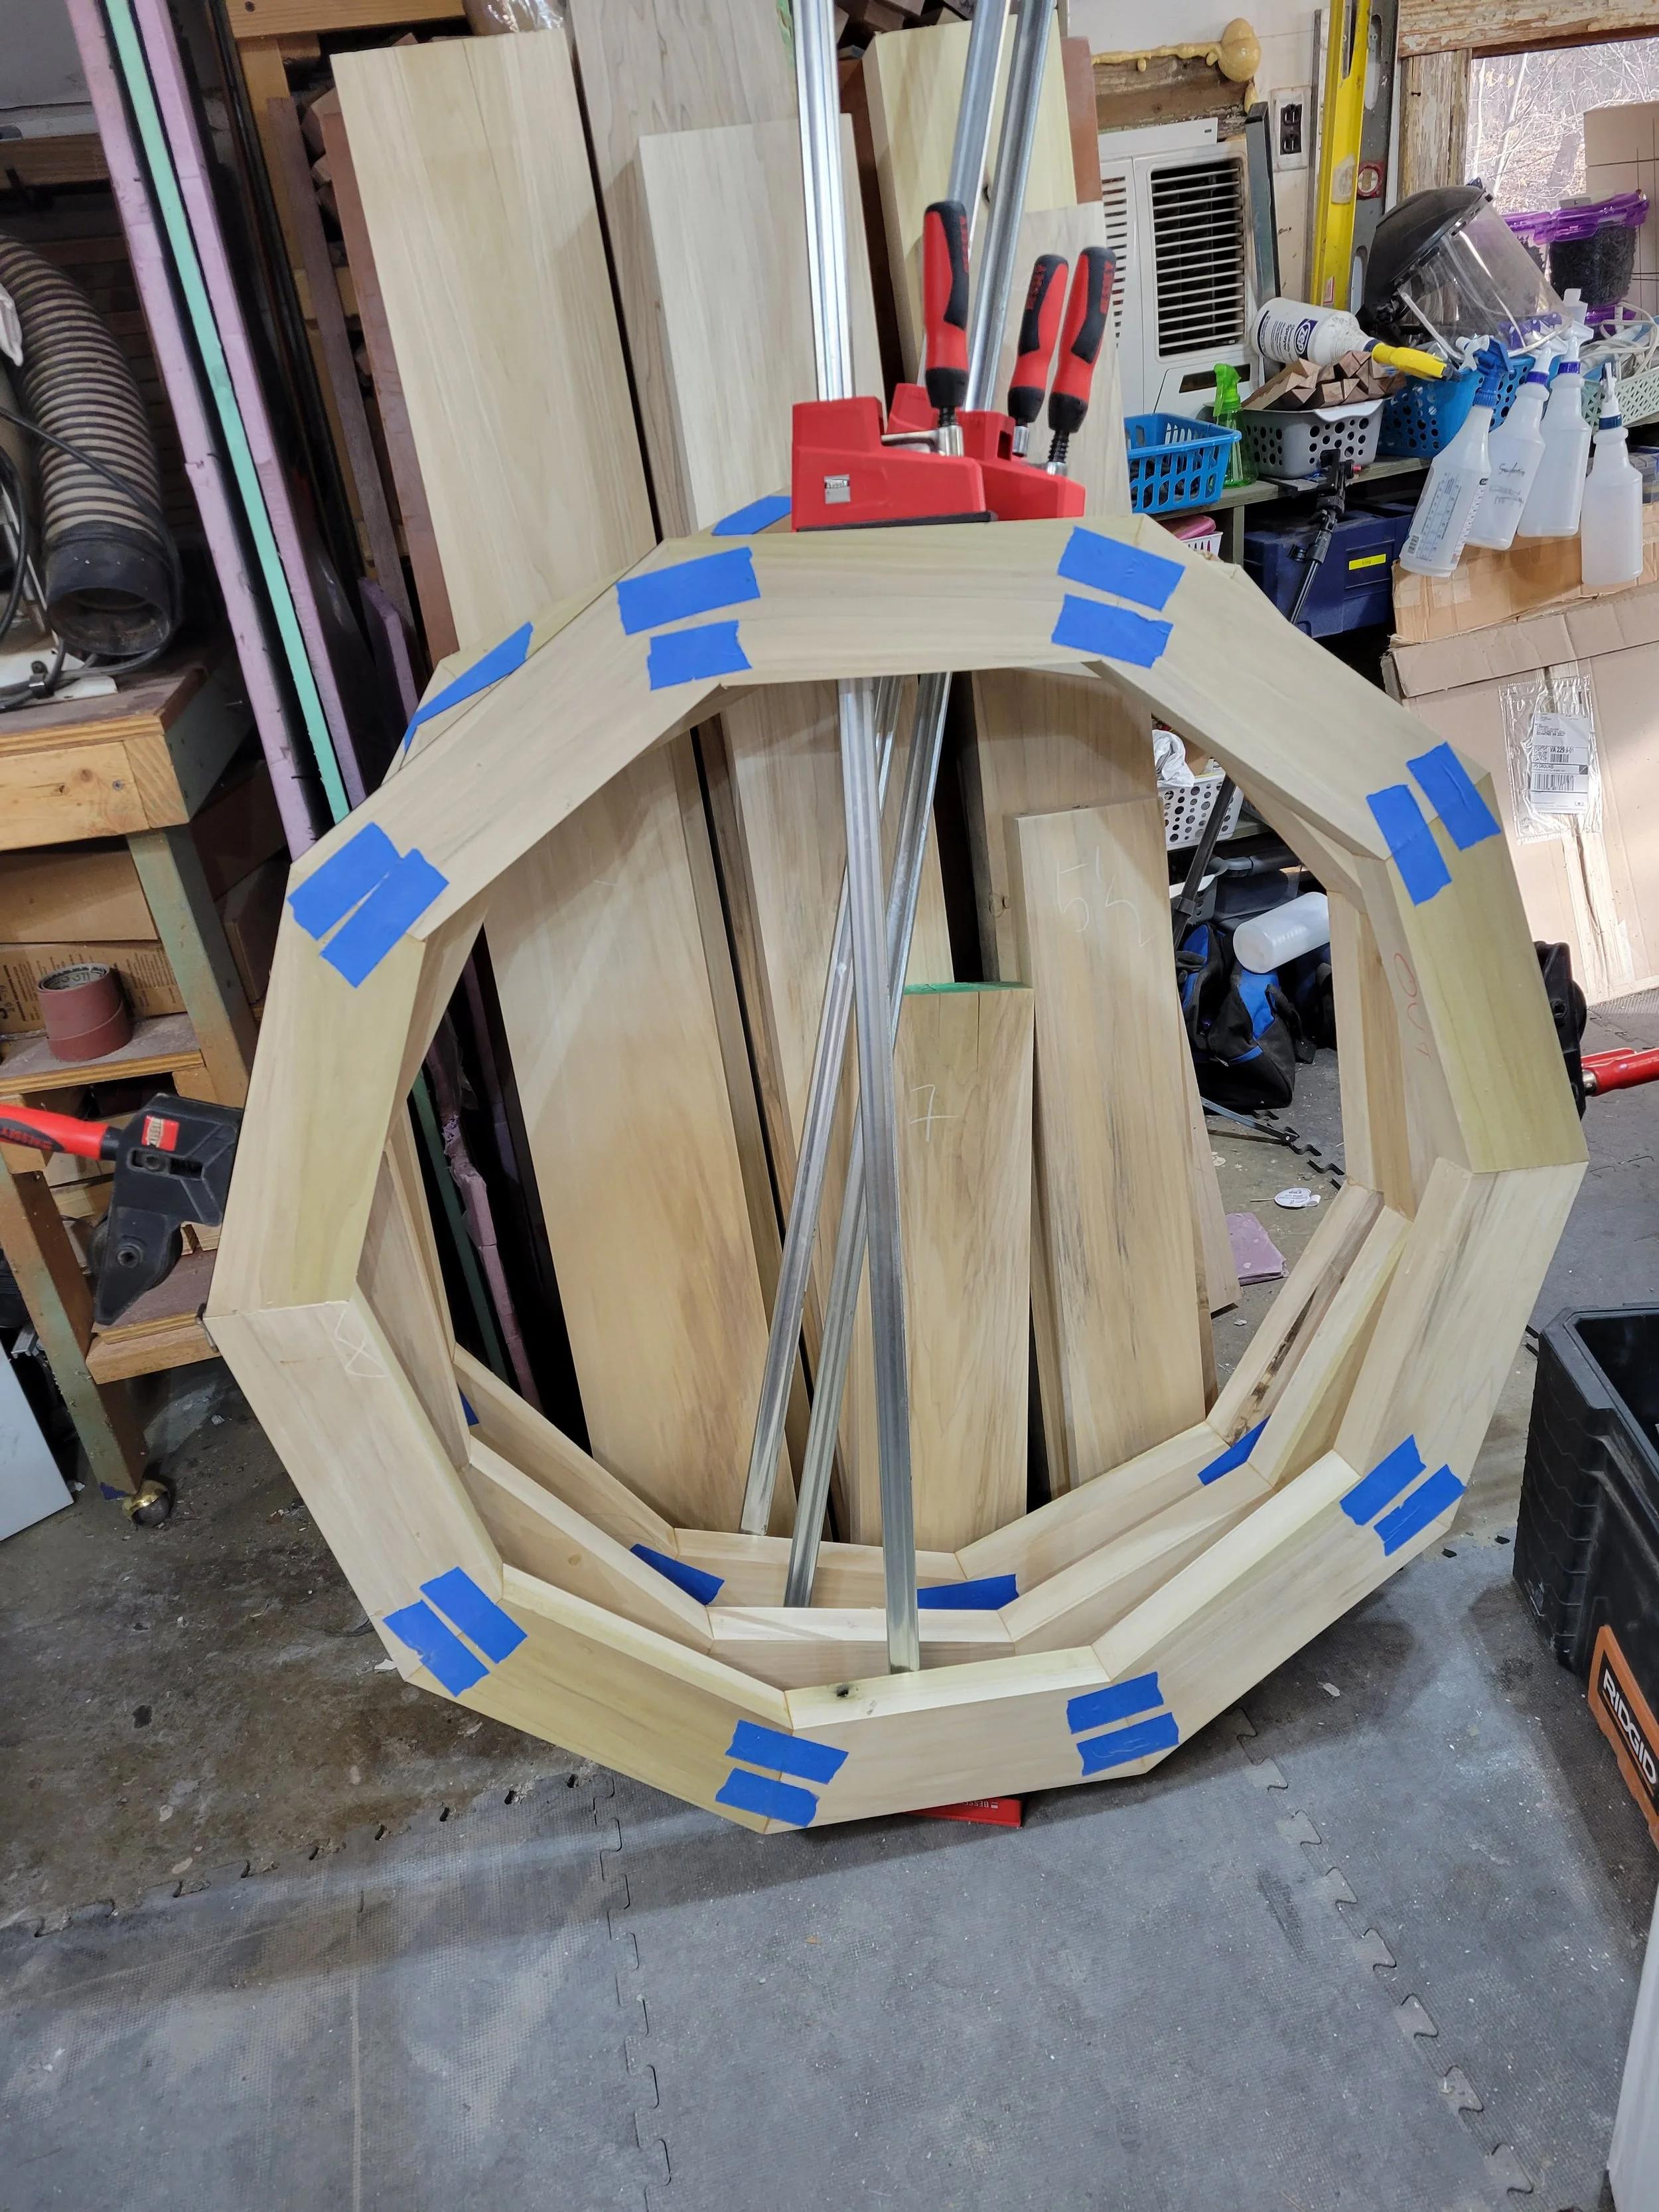


Key-stoning each Circle
This is the final step of each circle. Getting all the pieces to match exactly is a tall order for something this big, so I glue all but one together and then custom fit the last piece for each layer. It is very satisfying when it slides in.
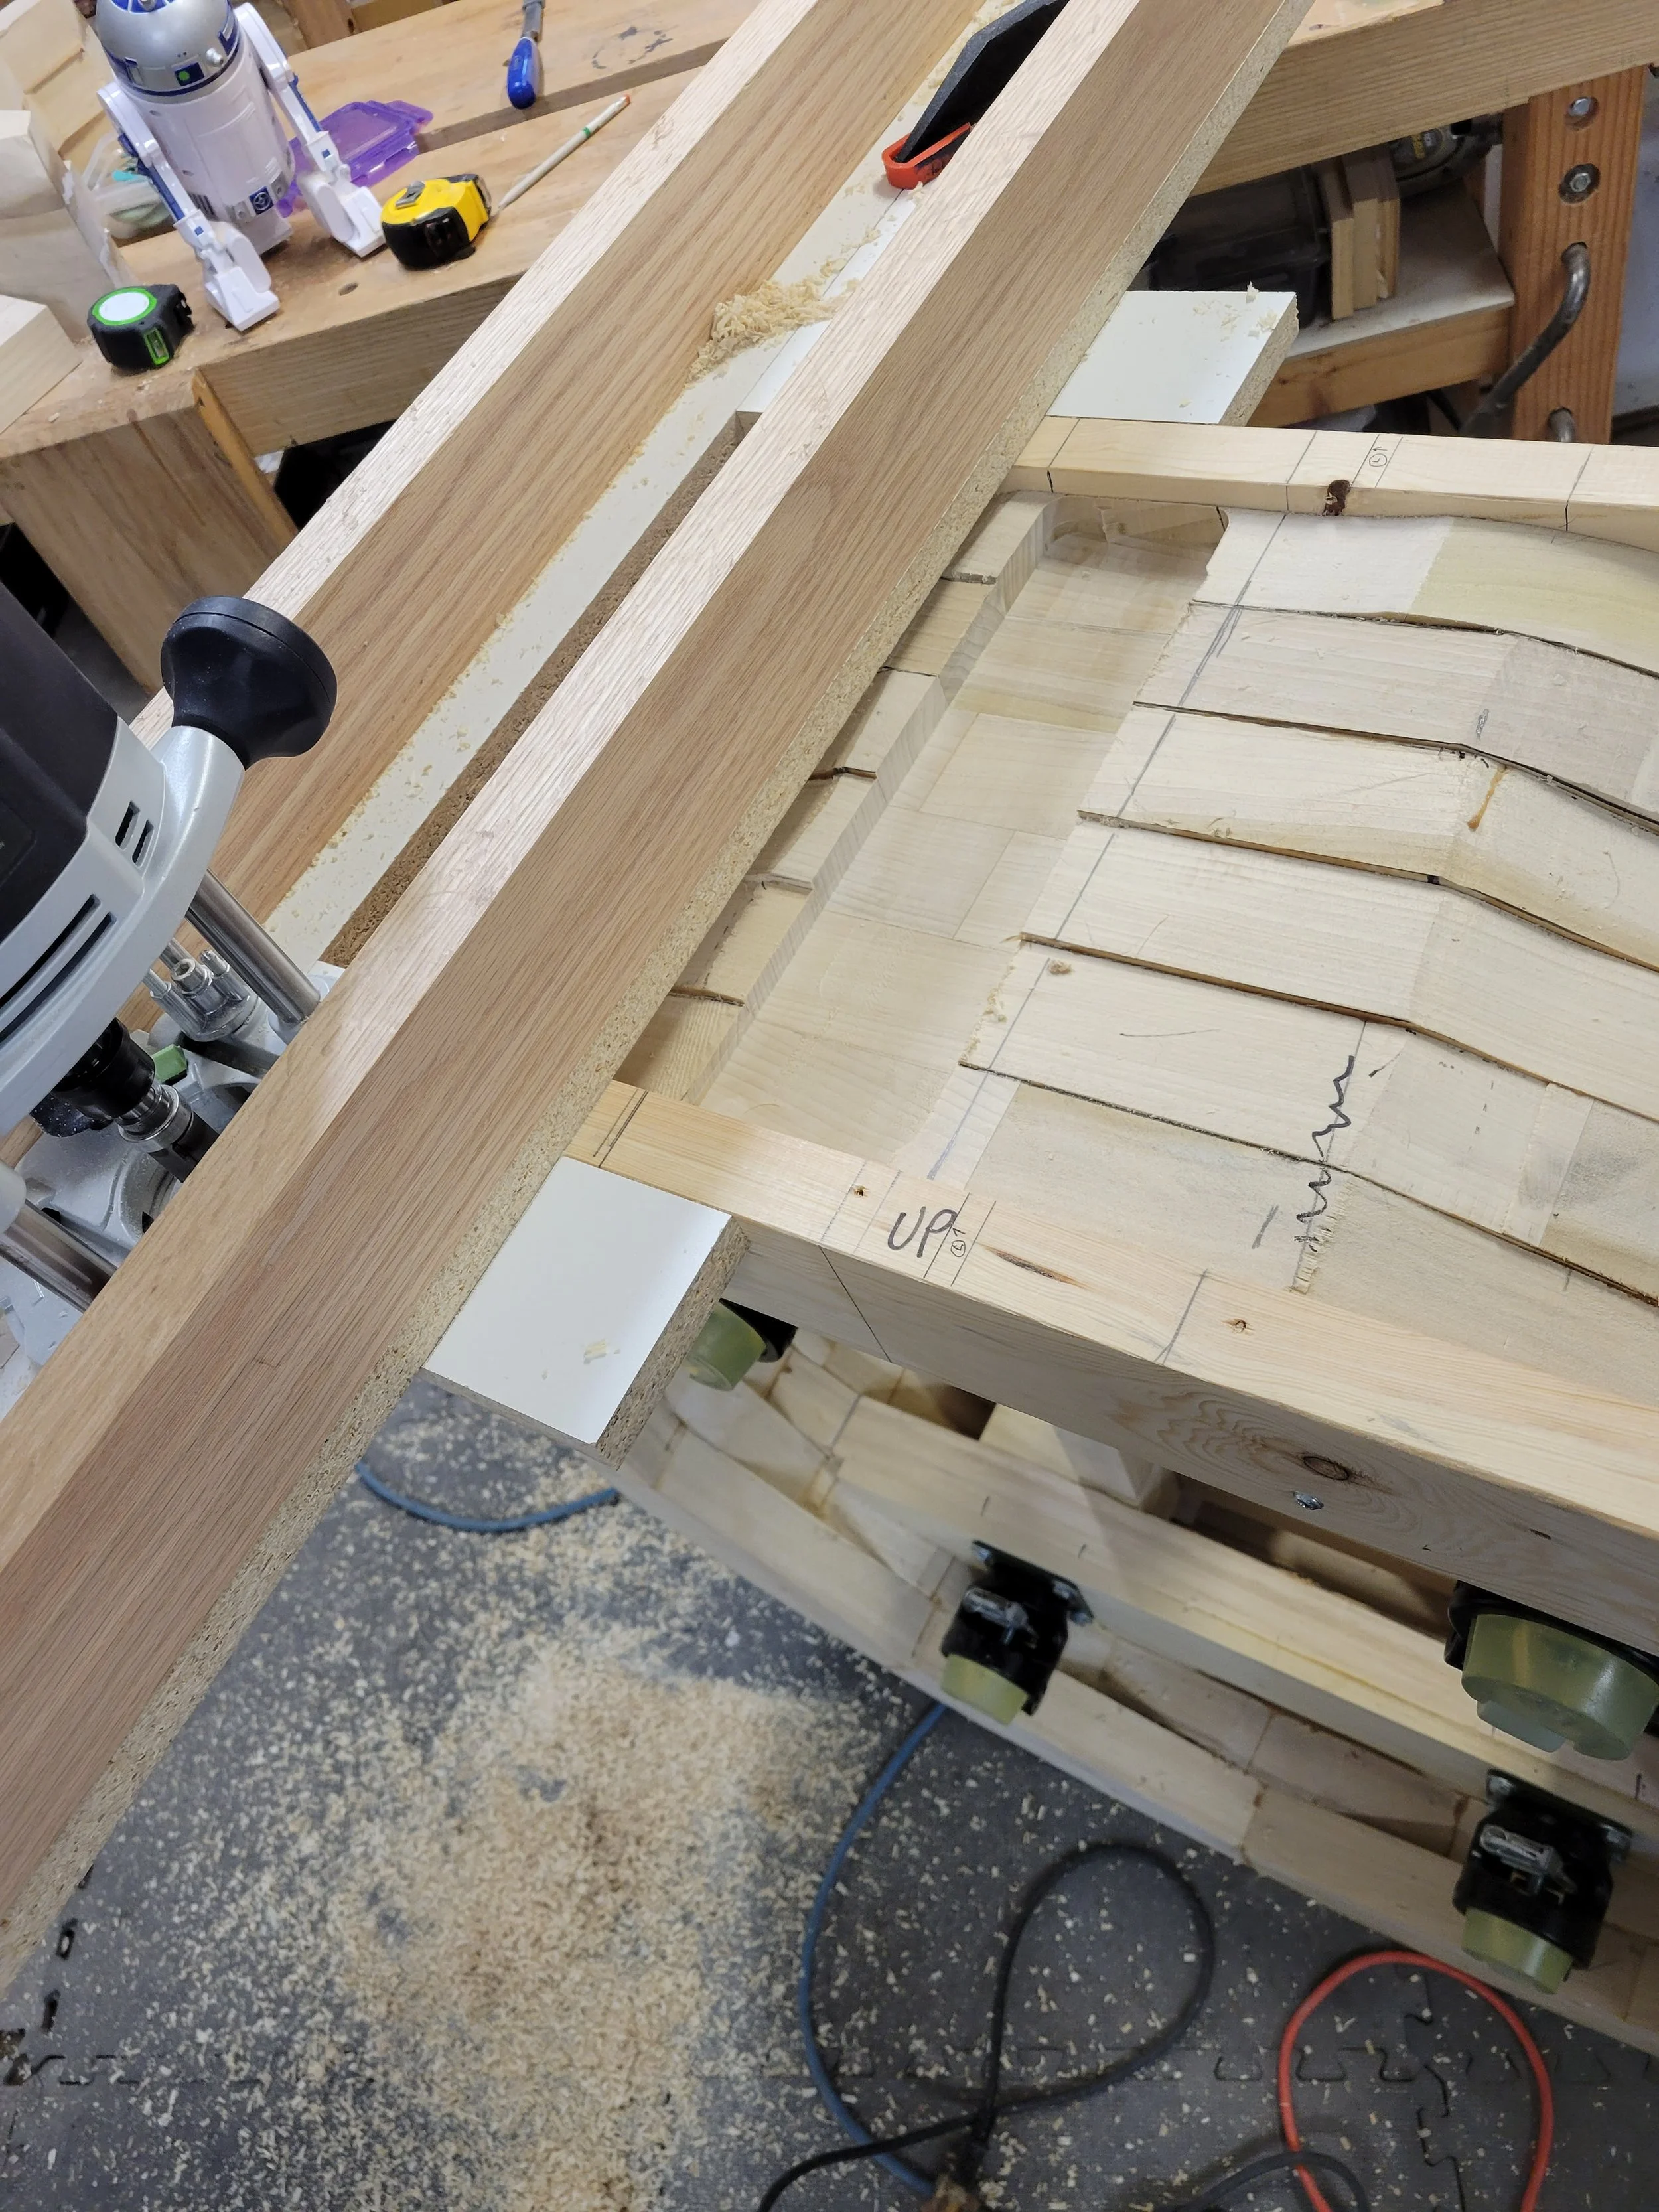
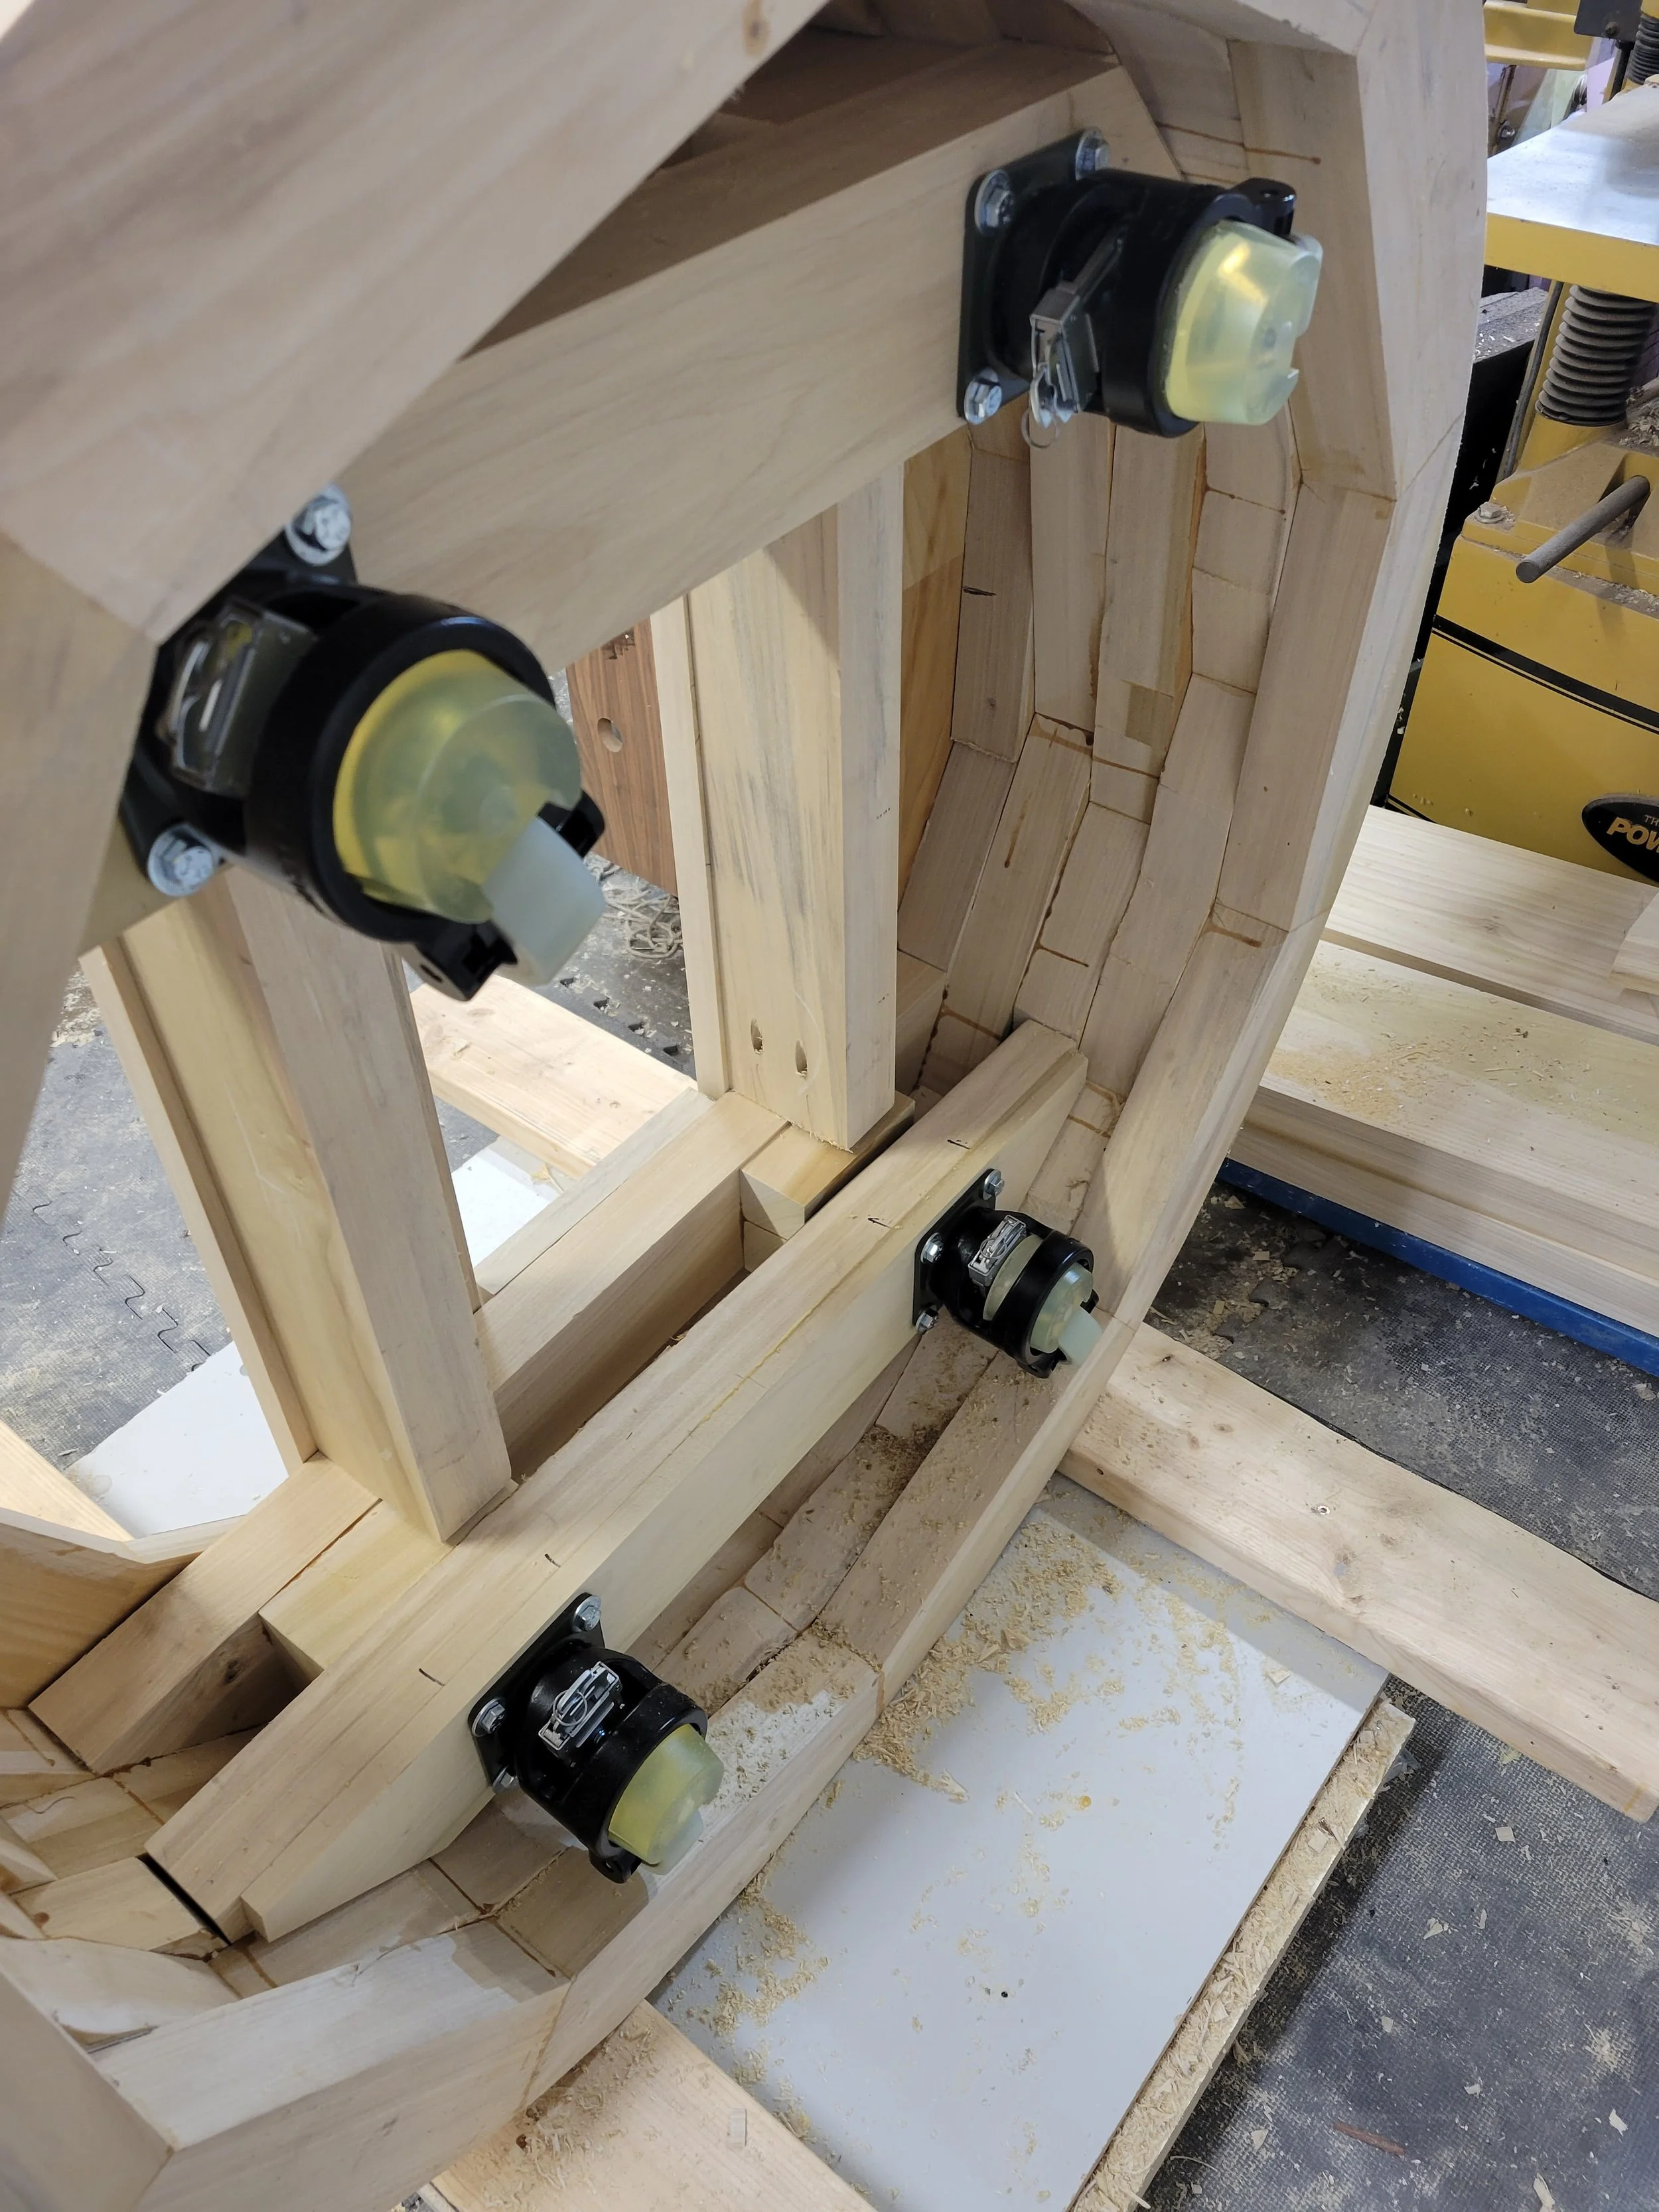
Routing the flats for the sides
The layers of the circles are now stacked to seat height. I have to create a flat area where jointery will later go for the side bulges. I do this by attaching 2 pieces to the top and bottom at plum and level heights when the chair is oriented in its normal position. I then turn the chair on its side and use a router on a bed to make the section flat. While it’s on it’s side, those crazy industrial casters are installed. R2D2 was Quality Control on this section.


Cutting the inner seat circles
The outer shape is getting carved with the angle grinder, but the inner shape needs to be done more precisely. It is where the curved back seat cushion will sit flush, and this needs to be a smooth and consistent transition with each layer. The first step to to figure out how the thicker back transitions down into the arm and fades into the smaller seat circle (1st row of photos). I then make a template which is the white melamine board and that gets put on top of the top layer of the seat. There is a lot of material that needs to be removed, so I start with at drill to remove a lot of waste and then switch to a router on a sled (the 3rd and 4th rows of photos) to create a level bottom and flush it up to the template. A similar process gets done for each of the next 8 layers, this time using the layer below it to flush it to the next layer... you can see this a little better with the photo with blue tape in the last row. The blue tape layer is the next top layer. I set it on the seat, trace what the shape is going to be, use a jigsaw to cut it close to the lines, glue it to the layer below it, and then do the router method to flush trim it to match the lower layer exactly.


