Concrete + Walnut Headboard
and Floating Shelves
Here for the life of your project…
The button below will open your care and maintenance instructions. I am always here if questions arise.
(These are not complete yet, but will be updated so you have them when your headboard arrives)
Welcome into my shop…
Below are just a few images taken during the making of your concrete and walnut headboard and floating bedside shelves.
I hope you enjoy seeing the behind the scenes shots.
It All Starts with Design
We went through a lot of different iterations of color combinations and layout orientations. In the end, I am so happy with how it turned out and our collaboration in making this piece a reality!
Milling the Walnut
From once, a tree. I absolutely love when I have photos of the original flitches of the tree that your piece came from! Yours are the 2nd and 3rd flitches from the top on that 1sts photo. It’s always so fun for me to see that initial cut off the bandsaw transform into a thing a beauty.
The photos are showing the steps in laying out the boards and cutting them into the different length sections for the 5x pieces.
The vide is the process of flattening the slab. With smaller pieces, this is done with a Jointer and Planer, but with wide flitches such as yours, we use a flattener that has a very large router bit on the bottom. As you might imagine, it’s a loud and dusty process!


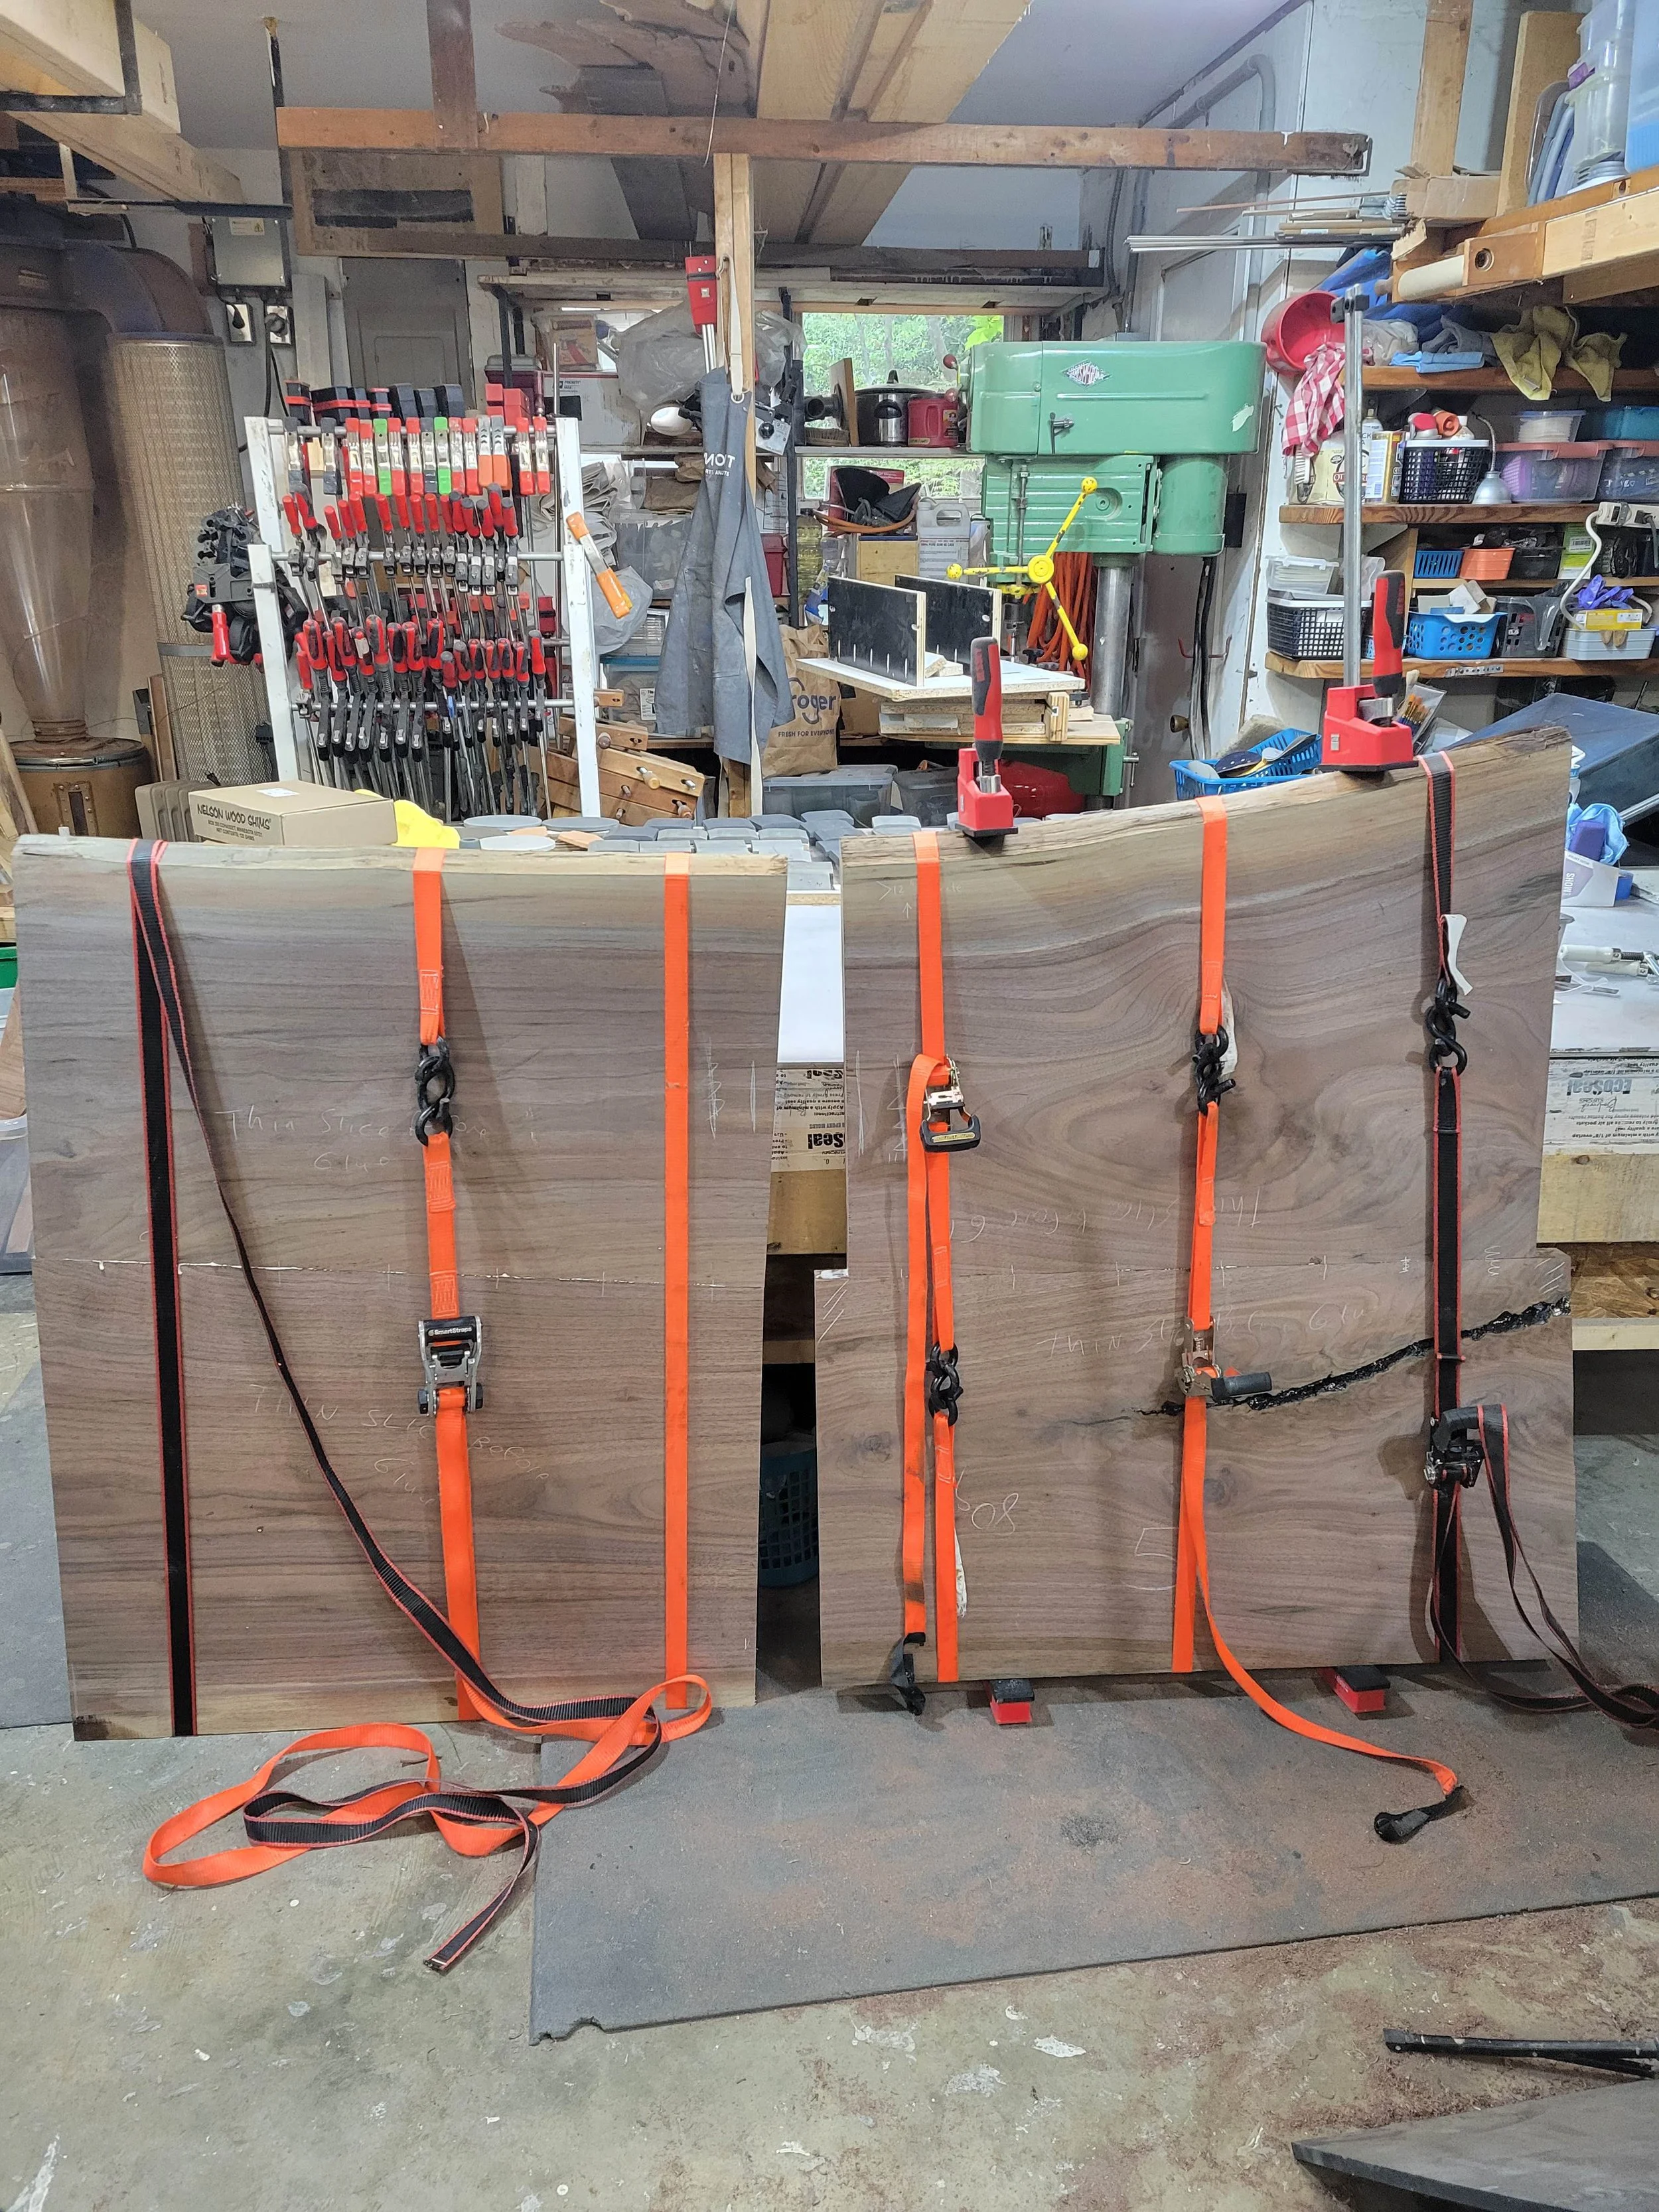
Laying out and Gluing the Walnut
Layout is such a critical step in my process. You can join two edges of wood together, but that doesn’t mean you always should. The top row is showing how many times I go back and forth with how much to take off of each piece to make sure the grain lines up nicely and we don’t have a patch of light sapwood disrupting the flow. You can see on the 1st photo all the sapwood and “disjointed-ness” of the piece and how that goes away by photo #4.
I then route out mortises for floating tenons so that the two pieces join together seamlessly. And, as is obvious by the last photo, I don’t have clamps big enough to glue the pieces together - and they wouldn’t work even if I did… the live edges of the boards makes it almost impossible to get a parallel clamping surface. Part of the challenge and reward of working with live edge wood.


Epoxy and Butterflies
I absolutely despise epoxy, but use it to help with small cracks. And, in this case, we didn’t want to see the wall behind that large crack on the right panels, so I used the epoxy to give us a thin “backer” before cutting for butterfly keys.
Butterfly keys are probably my favorite thing to do as a woodworker. The video shows just how satisfying it is to hammer them home.


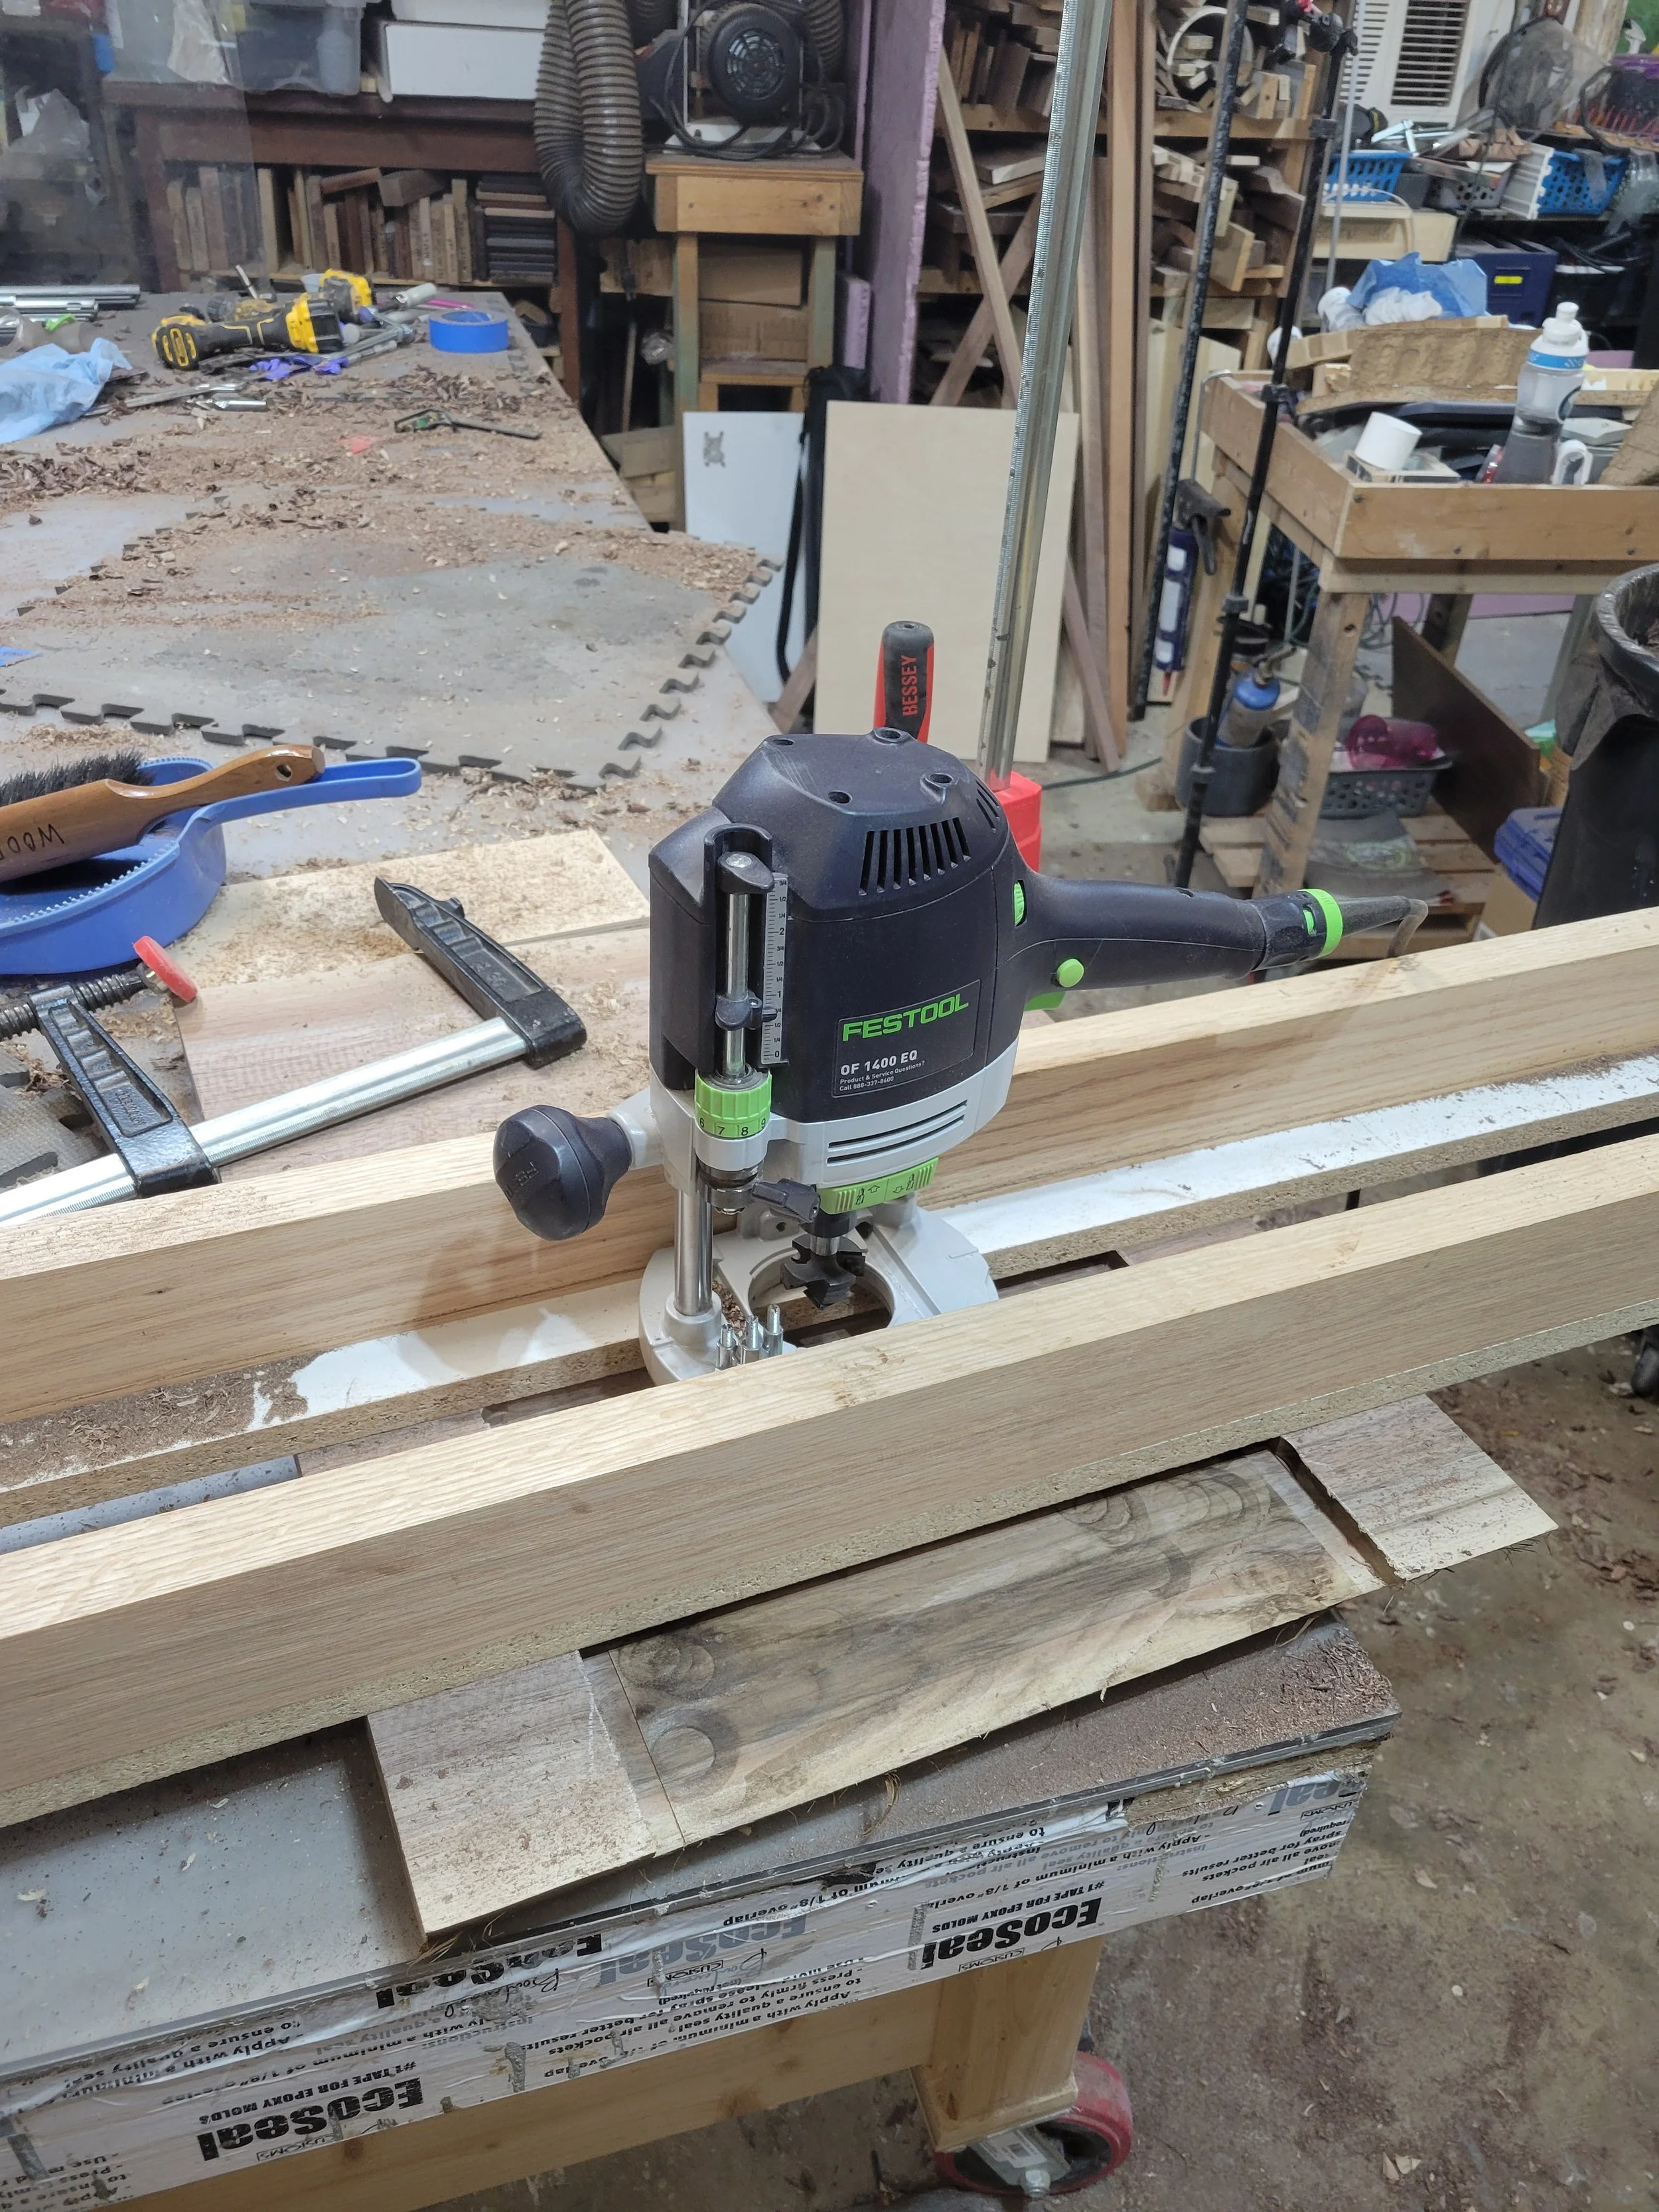
Preparing the Walnut Backs
Now that the panels are together, I need to make them more stable and to provide a surface in which the concrete and wood will connect together.
The first 3 rows are showing the process of routing out a flat surface to attach the plywood back later. I cut the outer frame with a smaller router bit and then use a sled and a big ole’ flat bit to hog out the middle. The bed and a stop depth for the router ensures that I route the same depth for the entire panel area.
The last 2 rows show the process of routing out V grooves for stabilizers to sit into. These stabilizers (a cut off is shown in middle photo of the bottom row) are made of steel and really help in keeping the wood panels flat throughout their life. We’ll never see any of this once it’s hung, but both are critical for the functionality of the headboard.


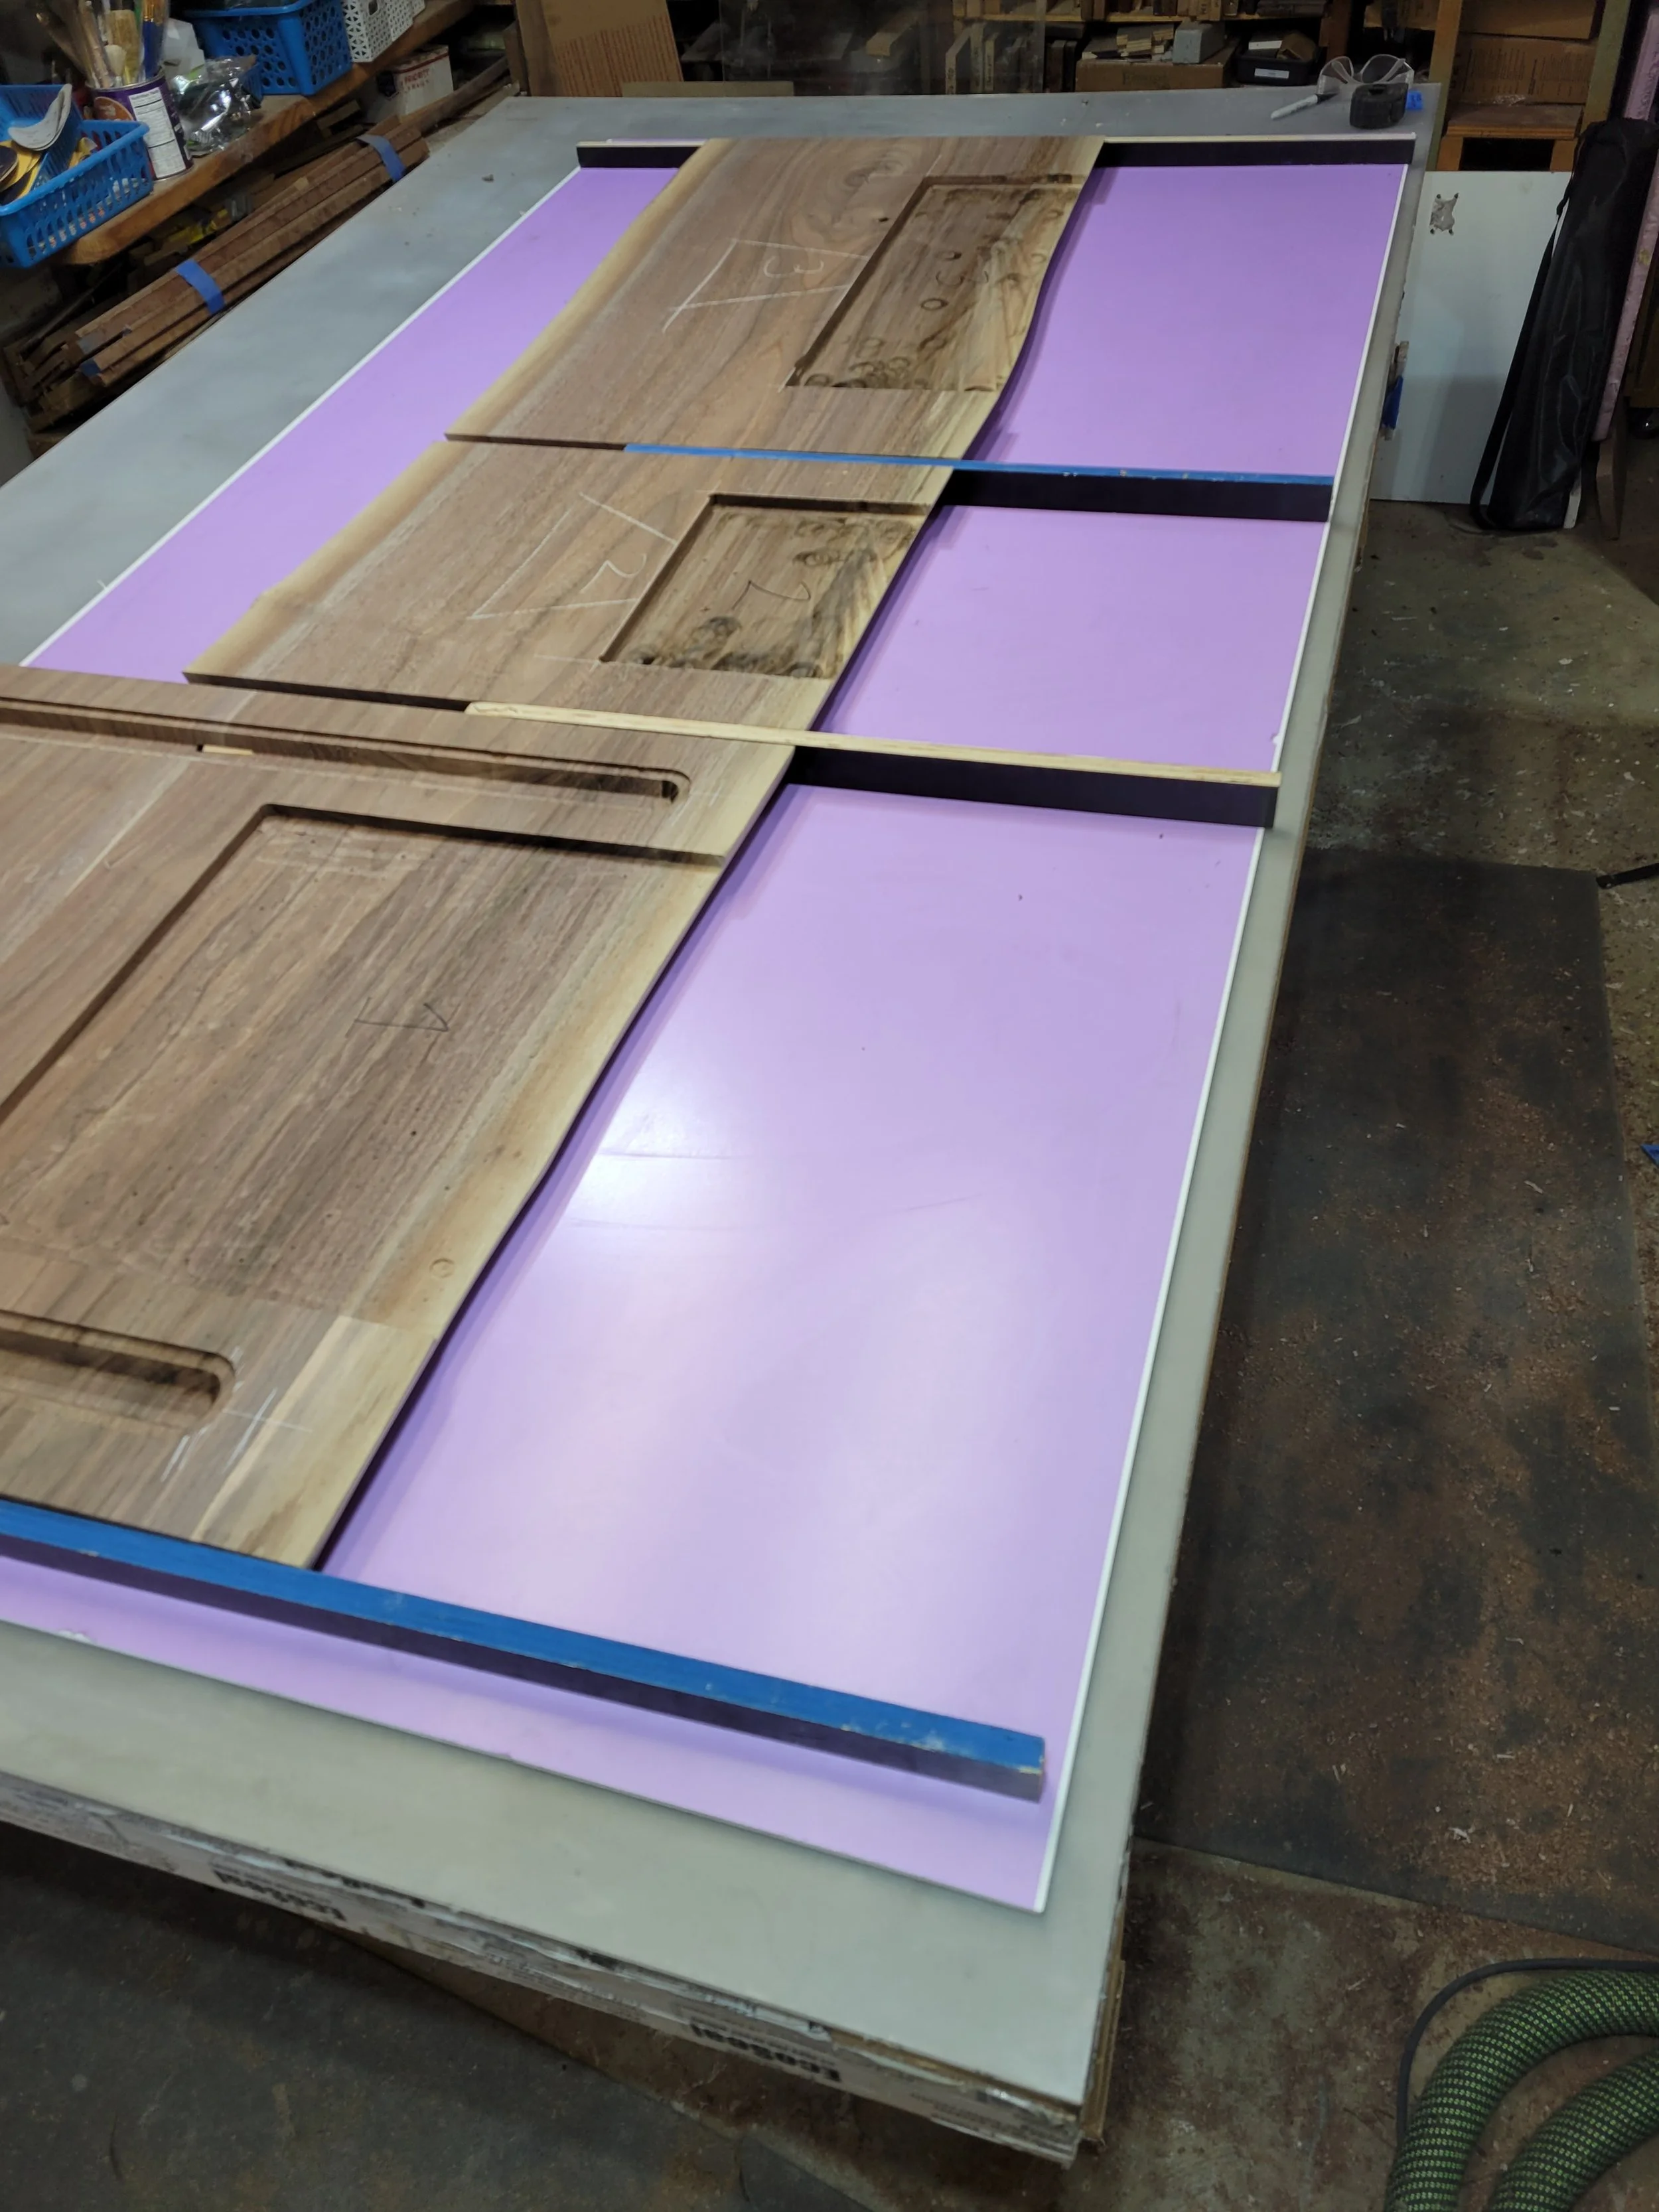
Making the Wall Panel Concrete Mold
Now onto the mold to pour the concrete into…. I use PVC board - a type of board that sign makers use - that is quite water resistant - to pour the concrete into. The purple is a protective cover that I keep on until I am just about ready to pour.
It would be super easy to lay the wood on the PVC board and make a box around it and just pour the concrete. But then the wood and concrete would be the same level and it just does not give the depth that I love.
So, I, of course, do a bit more work to get a subtle (but critical) detail - in my opinion. Therefore, the edge of the PVC board needs to match the edge of the live edge wood. So I trace each piece of live edge and cut it on the bandsaw so that they match. I then cut the sides to match the width of the wood.
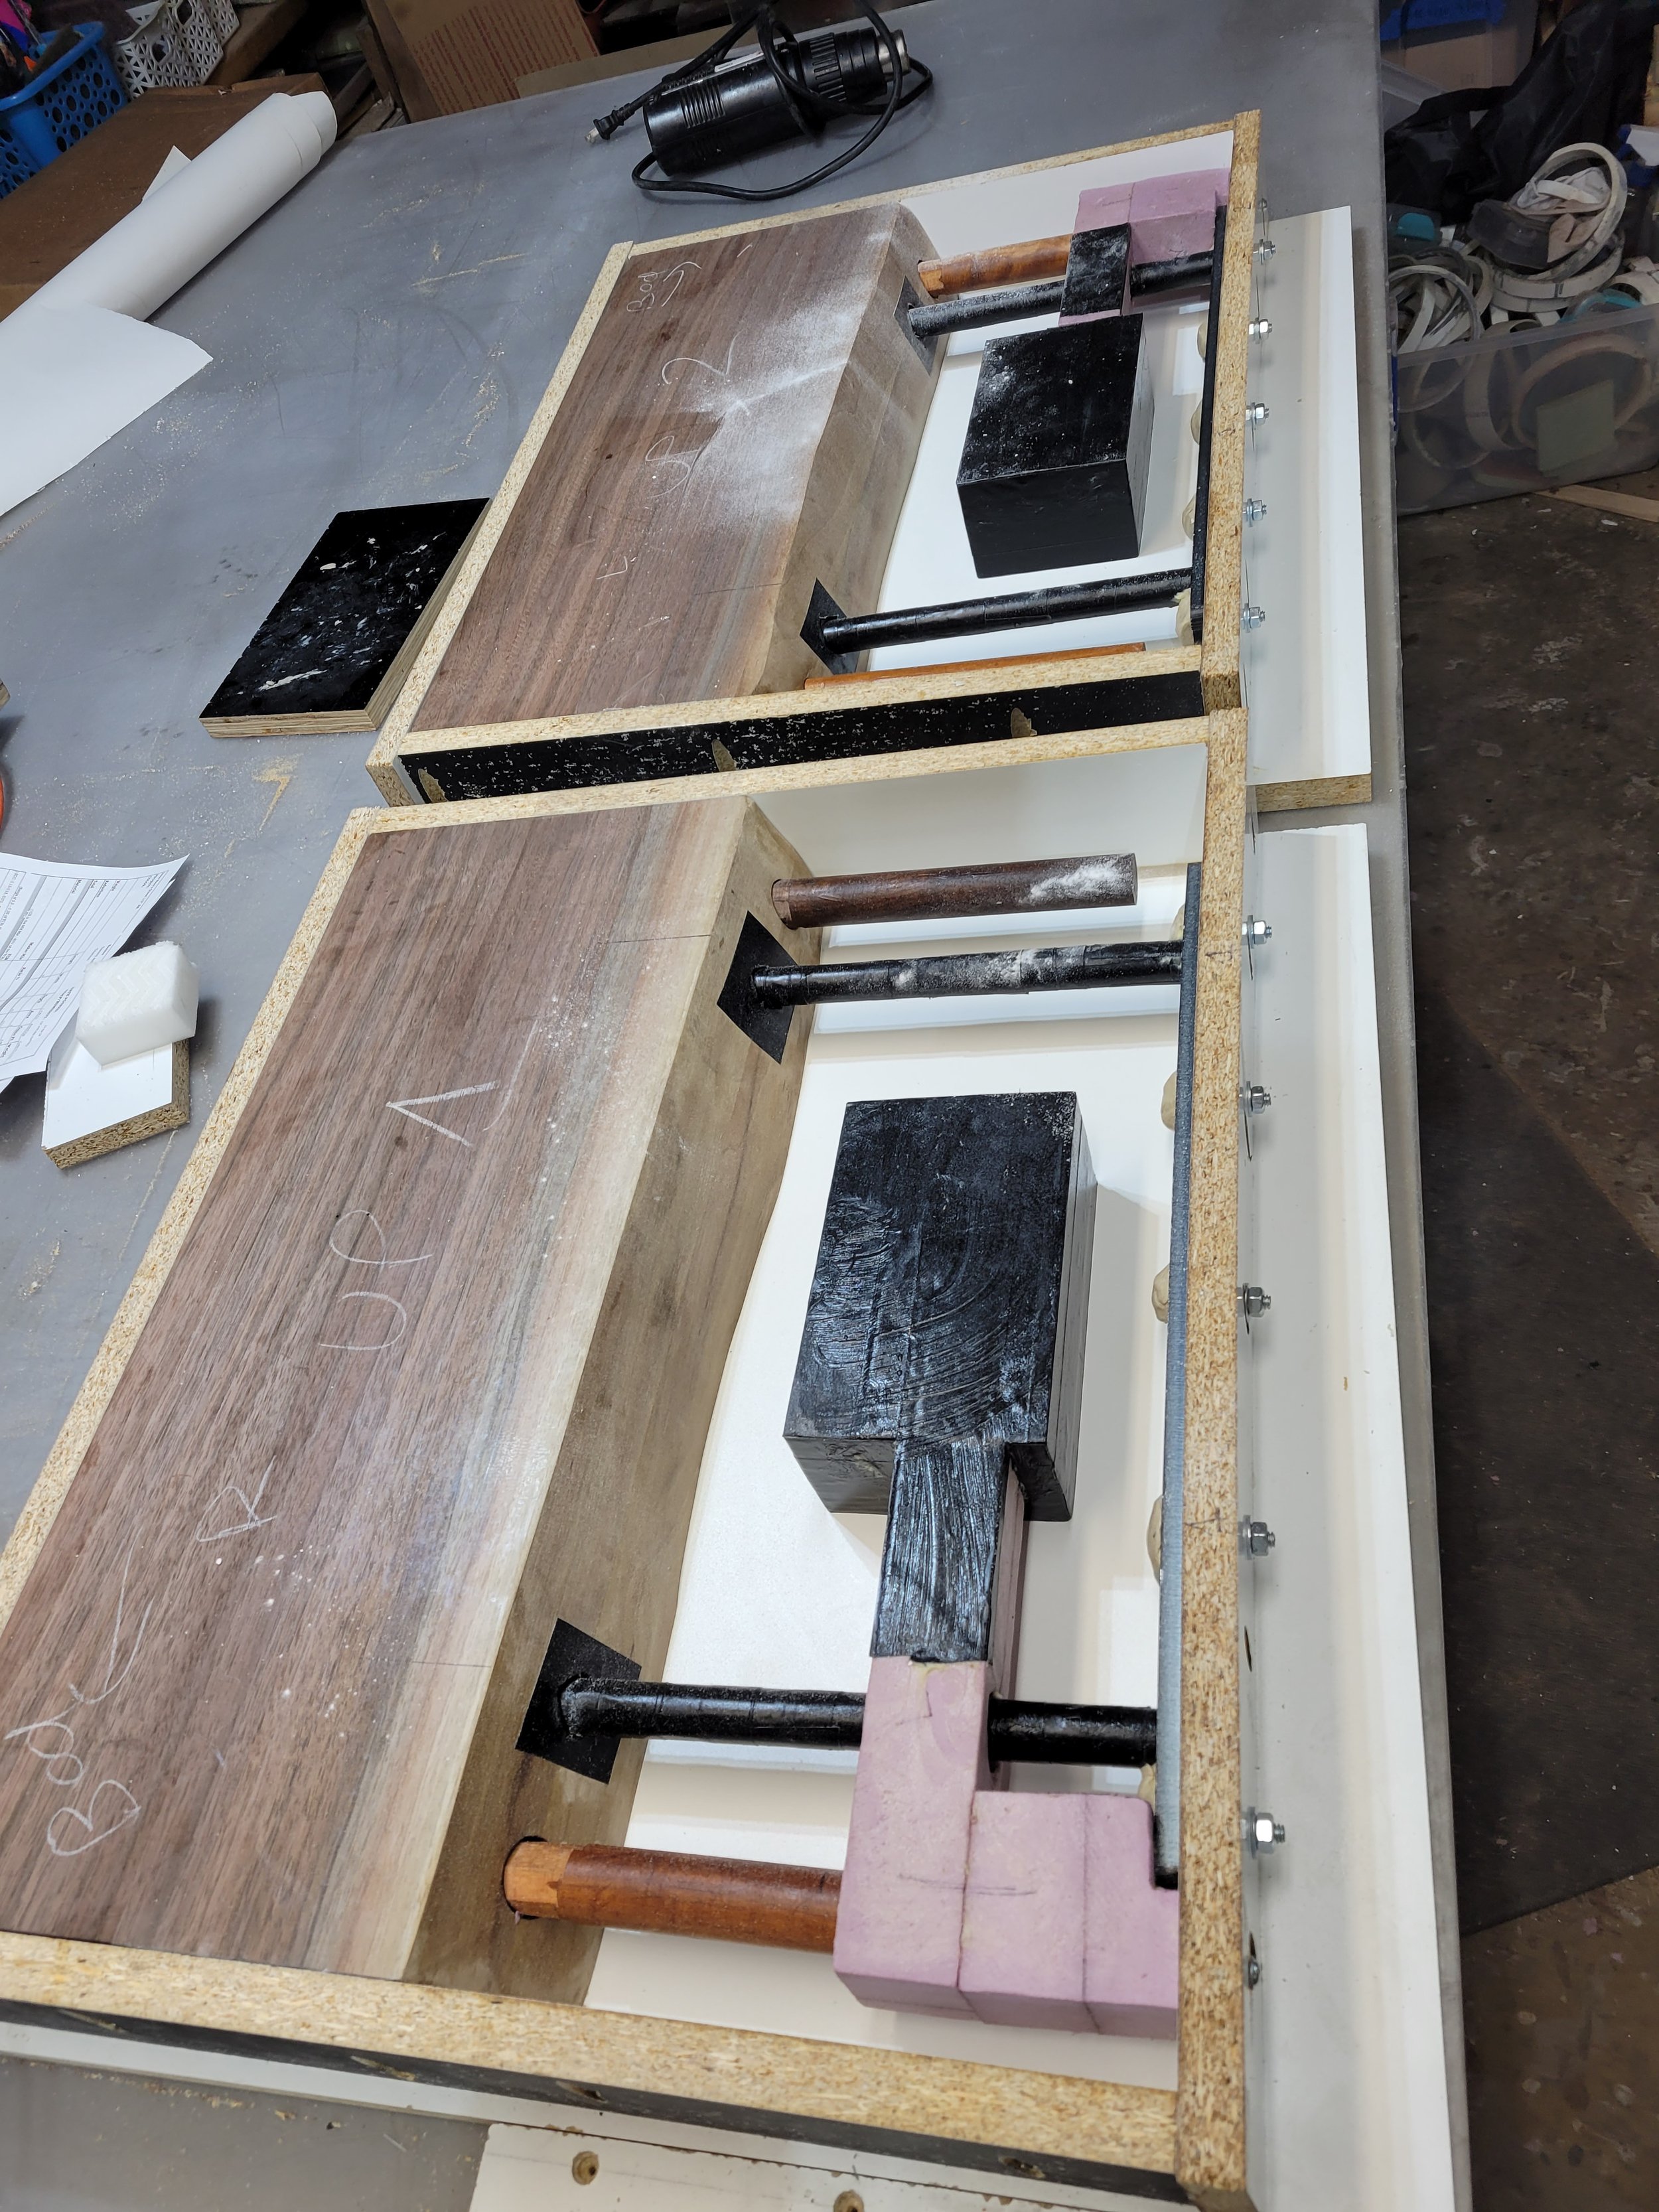
Because I wanted to make sure the tops of each piece are in line with each other and have all the live edges meet - and because this piece is 12’ long and I don’t have a table that big - I moved to the floor to make the forms and pour the concrete.
While this forming can be distilled into less than 20 photos, this was an extremely detailed and laborious process. Getting 12’ of live edge to match up and then have that match the top level line and have the same amount of spacing between them all was about a 3 day task. So incredibly satisfying when it all came together, but I will admit that I took an office day after that - my knees were not happy with all of that floor work! ;-)


Pouring the Concrete Wall Panels
Of course, the most exciting part of concrete pieces is the pour itself, though this takes about 5 hours while it’s taken 3 weeks to get us up to this point! Hahahahahaha!
Once everything was lined up and had melamine frames, I waxed and caulked the forms. The first photo shows the plywood backs temporarily in place. You’ll see in the time lapse video how I place and screw those backs into after the face layer of concrete has been poured. The rest of the concrete then forms around the plywood so that there is an empty cavity for me to later attach the wood and concrete with the plywood backs.
Once the concrete is poured, they get covered, the temp rises to about 140F, and the concrete cures for 48 hours.


Preparing the Wood for the Floating Shelves
While the concrete was curing on the panels, I turned to the floating shelves. Because of the dimensions of the pop-up charger, the shelves had to be double the thickness I originally thought. So I took live edges from the same slab and glued them together in a way that would make the seam between the 2 pieces as invisible as possible.
Once glued, I used an angle grinder to shape the live edges so they matched up.


Building the Mold (2 Times) for the Concrete Portion of the Floating Shelves
As it turned out, the floating shelves for more of a challenge than the 12’ headboard. Adding foam into the concrete mold was critical so that the pop-up charge fit perfectly and there was a channel for the cord to come out the back. Where the foam was is where there is now a hollow cavity in the concrete. I also needed to have holes in the concrete for the floating hardware brackets to slide into as well as dowels as a way to attach the wood and the concrete. I couldn’t use the same system of plywood as we did on the panels because you will see the underside of the shelves from downstairs and that plywood would just not do.
I learned a lot of things from Attempt #1. But even with what I thought was an over excessive amount of wax and release on the steel hardware, it would not come out of the concrete. And you need to hang the hardware first and slide the shelf onto it for it to work, so out came the angle grinder and shelves #1 and #2 got turned into many small pieces…. I can send them up as boat weights if you want. ;-)
Attempt #2 actually turned out to be a blessing in disguise. We were able to shorten the shelves a little which saved considerable weight, and I learned that I need PVC tubes around the steel in order to get back out. I also gave myself a little more room to route the charger cord through, so shelves #3 and #4 were a total success.


Pouring the Concrete for the Floating Shelves
I could watch pour videos all day long… enjoy this one of the shelves being poured.
After they sit for 48 hours, I remove the foam board in a number of ways. The photos show the satisfaction of the wood and concrete parts coming together


Polishing, Sanding, and Finishing the Concrete and Wood
Heading into the home stretch, the concrete gets flipped, taken outside, and polished. This reveals so much texture and movement. I used baking soda in the forms to create some of the texture you see. Baking soda and concrete are like oil and water, and the baking soda creates voids in the concrete to give it movement. I then seal the concrete with a penetrating sealer.
Walnut is my wood to finish. Putting the oil on just brings the wood to life. The video really highlights this transformation.


Putting it All Together
This is the step that we are at now. The concrete and wood are going to get married. I’ll post photos here of that process as it happens.


